Showing posts with label appetizer. Show all posts

Tuesday, July 10, 2012

Bruschetta


A few weeks ago, my friend Shannon brought this bruschetta to a church activity. I knew right when I tasted it that Steve would love it.  I made it a couple of weeks later for a BBQ we were hosting at our house, and then again for our family 4th of July BBQ.  I had some left over the 2nd time, so I sauteed it the next night and served it on Steve's pasta with Alfredo sauce. He really liked it.
The recipe says to serve it on focaccia that has been toasted under the broiler then rubbed with garlic. That is how Shannon served it, and it was super yummy. I did it a little more low-key and just served it with a sliced baguette. This is a great make-ahead appetizer. 


Bruschetta


2 cups cherry or grape tomatoes, quartered or halved, depending on their size
1/2 small red onion, finely chopped
3 Tbsp. chopped fresh basil
3 Tbsp. olive oil
1 1/2 Tbsp balsamic vinegar

Combine all ingredients, toss to coat. Let sit at room temperature for a couple of hours before serving, tossing to coat occasionally.  Serve with bread that has been drizzled with olive oil and toasted, then rubbed with fresh garlic.
* I added 1 clove of chopped fresh garlic to the bruschetta the second time I made it since I wasn't serving it with bread that was rubbed with garlic.


Friday, January 13, 2012

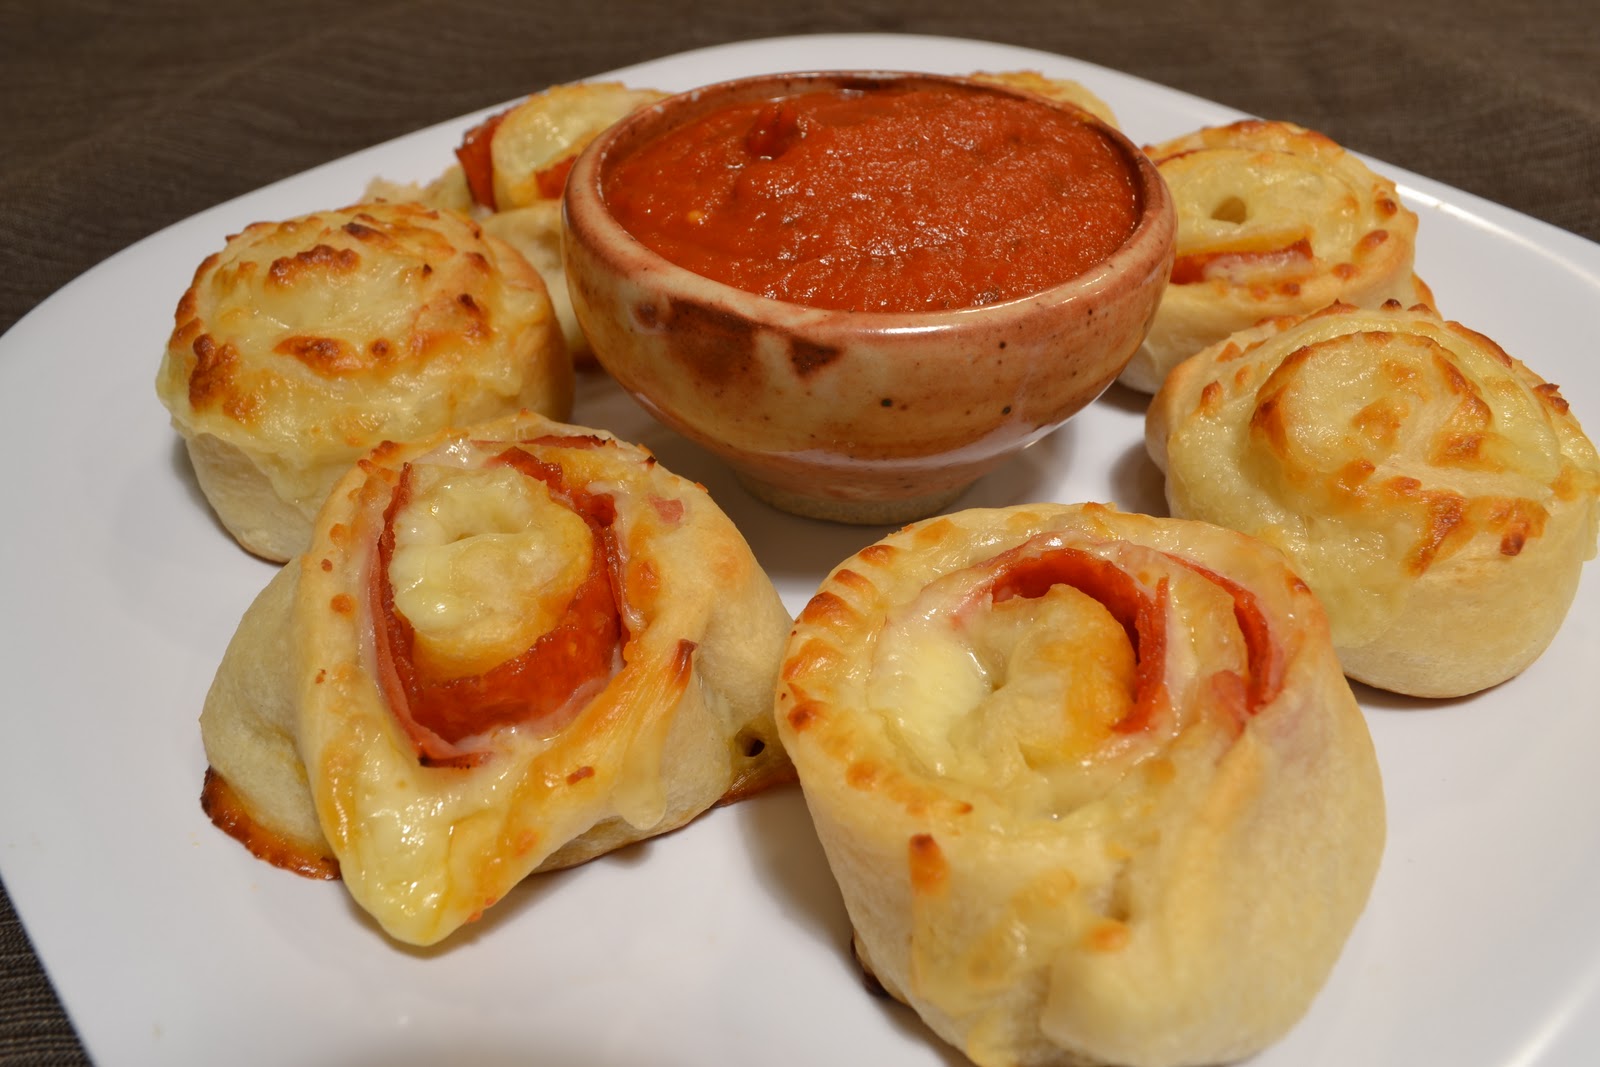
Pizza Pinwheels


This was a fun and easy dinner that everyone enjoyed. The best way to explain these is that they are like cinnamon rolls, but pizza instead. I had great intentions of making my own pizza dough for these, but when I was grocery shopping a little voice in my head told me that buying the cans of Pillsbury Pizza Dough would be a whole lot easier, and that is what I did. I had never bought that kind of pizza dough before, and wasn't too surprised when it tasted just like the canned biscuits. Next time I make these I will make the dough, however, for a quick meal, the canned dough worked out great.
A big thanks to my friend and neighbor Sasha who saved my hide with a jar of spaghetti sauce. While these were in the oven, I ran down to my storage room to grab a jar, only to realize that I didn't have any! Guh! Thanks again Sasha!
FYI, I had no idea how much to make. I used three cans of pizza dough. Each can made about 12 rolls. That was obviously WAY too much for my family of six. Two cans would have been plenty! Also, I used the "thin crust" cans of dough.

Pizza Pinwheels

Pizza Dough
Cheese
Pizza toppings
Marinara sauce for dipping

Roll out dough into a triangle. Top the dough with cheese and whatever pizza toppings you would like. Starting with the long side of the rectangle, roll up the dough into a long log. Use a sharp knife to slice the log into about 1 inch slices. Place slices on a cookie sheet that has either been sprayed, has parchment paper. Bake at 400 degrees for 10-15 minutes or until the pinwheels start to turn golden brown. Serve with marinara sauce (and for my family, Ranch dressing) for dipping.

Wednesday, December 14, 2011

M.A.'s Ranch Dip


We make this dip a lot at our house.  All 6 of us love veggies and dip. This dip is also part of our General Conference traditions. We always eat veggies, crackers, ham, and sliced cheeses with this dip during the second session both Saturday and Sunday. It is the perfect lunch after we have our traditional breakfasts during the morning sessions (we always have this and this on Saturday and this on Sunday). Conference weekend is a BIG deal at our house, and the many simple traditions we have are what make it such a big deal.
This last conference weekend was the first time that the kids faced a lot of conflicts with other activities that were scheduled during the Saturday sessions of conference. I was really proud of my kiddos though for understanding how important General Conference is. My 8 year old missed her soccer game and my 5 year old missed a birthday party (well, he did get to go for the last 25 min, after conference ended). Neither of them even complained a single time. I was so proud of them. I know it is just going to get more difficult from here on out, as they get older and more involved in things. I am hoping they will always choose Conference over anything else.
We all love conference weekend and talk about it and look forward to it all throughout the year. My oldest daughter actually sits and listens to all the talks now, which is so exciting to see. Hopefully the other 3 will follow suit in the years to come.

M.A.'s Ranch Dip

16 oz tub Sour Cream
16 oz tub Cottage Cheese
1/2 - 1 cup milk
2 packets Hidden Valley Ranch DIPs mix

Mix all ingredients together. Refrigerate for at least 30 minutes before serving.

Monday, October 3, 2011

Lettuce Wraps


I love, love, love lettuce wraps. I have wanted to try making them for a long time, but most of the recipes that I have found in the past had a lot of complicated ingredients and just didn't seem like they were worth the effort. I found a more simple recipe recently, and then kinda adjusted it to my style and tried it out. They didn't disappoint. I think that this recipe could be pretty versatile and fun to play around with and try different flavors and adding different things.

Lettuce Wraps

1 lb ground chicken breast
3-4 cloves garlic, minced
about 1 tsp fresh grated ginger
1 Tbsp olive oil
2 1/2 Tbsp soy sauce
1/2 Tbsp water
1 Tbsp peanut butter
1/2 Tbsp honey
1 Tbsp and 1 tsp rice vinegar
2-3 Tbsp sliced green onions
about 1/2 can sliced water chestnuts, diced
Large iceberg lettuce leaves


Cook chicken in non-stick skillet. Breaking it up into small pieces as it cooks. Add garlic and ginger to chicken when it is almost done. Continue cooking. Mix together olive oil, soy sauce, water, peanut butter, honey and vinegar. Add this mixture to the chicken when chicken is completely cooked. Continue cooking for a few minutes, then add green onions and water chestnuts. Continue cooking for 3-4 more minutes. Serve in lettuce leaves.

Sunday, August 14, 2011

Fried Zucchini

Parmesan/ Bread Crumb Coating

Flour Coating

What is better than taking a healthy vegetable and making it totally unhealthy. I seem to be really good at that. I love fresh, crisp, or simply steamed vegetables, but, unfortunately, I also love them fried or dripping in a cheesy sauce. I pretty much love veggies any way they come, and was lucky to find a husband that feels the same way I do. We love fried zucchini, dipped in homemade ranch dressing. I am including 2 different ways you can make it. One is a Parmesan/bread crumb coating, and the other is just a flour coating. And, once again, I am just guessing on the measurements, because I just dump stuff in.

Fried Zucchini


1 large Zucchini
salt
1 egg
1/3 cup milk
1 cup flour
1/2 cup Parmesan cheese
1/2 cup bread crumbs
oil for frying

Slice zucchini into about 1/4 - 1/2 inch thick slices. Lay slices out on paper towels and sprinkle salt over them.   In a bowl, mix together egg and milk. Put flour in a separate bowl, then mix Parmesan and bread crumbs in another bowl. Put enough oil in a saute or frying pan so that it is about 1/4 inch deep. Heat oil over medium heat. Take a slice of zucchini and dredge it in the flour, then coat it in the egg/milk mixture. Finally, coat it completely in the Parmesan mixture. Place it in the hot oil and cook for 1-2 minutes, or until lightly browned, then flip over and cook on other side until lightly browned. Remove from oil and place on clean paper towels to drain. If you run out of the flour or Parmesan coating, simply add more.
If you would like to only use flour and not the Parmesan mixture, then omit the Parmesan and bread crumb mixture. Dredge the zucchini in the flour, then the egg mixture, then back into the flour to completely coat it before frying. We like it both ways and usually do some of each.

*You can also use this same recipe/directions for frying eggplant. In fact, there is a slice of eggplant in one of the pictures above.... can you tell which one?

Wednesday, May 18, 2011

Crock Pot Chicken Nachos

This is such a versatile recipe that you could do so many things with.  I really liked it as nachos with a little cheddar cheese melted on top, and sour cream. Any of your favorite nacho toppings would be great on these nachos.  The next day I used some of the left-overs and made a chimichanga for my husband, which he really liked.  You could use this for burritos, an enchilada filler or even serve it over rice. A bonus to this recipe is how super easy it is! I got this recipe from my friend Liz, whom I  love and adore. She is the same friend that also gave me this stuffing recipe.

Crock Pot Chicken Nachos

4-5 frozen, boneless/skinless chicken breasts
1 15oz jar of Salsa
1 can black beans, drained and rinsed
1 can corn, drained
8 oz cream cheese

Place frozen chicken breasts in crock-pot. Pour salsa over chicken. Cover and cook on high for 4-5 hours or until chicken can be easily shredded. Shred chicken and place back in crock pot with with the salsa (I was actually able to just shred mine right in the crock-pot). Add the black beans and corn, and stir together. Place the cream cheese on top of the mixture, then cover and let sit for 1 hour.  The cream cheese will then be soft and you will be able to stir it into the chicken mixture. Serve with tortilla chips and your favorite nacho toppings.

Tuesday, May 10, 2011

Mexican Chicken Scoops

We were first served these yummy little creations by our friends Grant and Maura.  Grant was in the MBA program with my husband at the University of Iowa. We were so blessed to become good friends with them.  After we moved to Utah, we were back in Iowa visiting when they made these for us.  We loved them and I asked Maura what was in them. She quickly told me the ingredients, and then after we were back home I came up with the measurements.  We love to make these as appetizers, and everyone we have served them to has also loved them.

Mexican Chicken Scoops

1 bag Tostitos Scoops (bowl shaped tortilla chips)
1 can chunk chicken breast (about a 12 oz. can)
1/2 tub garden vegetable cream cheese (regular cream cheese works fine too)
1/2 cup salsa
grated cheddar cheese

Drain chicken well. Mix together chicken, cream cheese, and salsa.  Fill chips with chicken mixture. Sprinkle cheese over the top of each one and broil on Low until cheese is melted.

Update 12/10/11
Grant passed away last month from Cancer. Steve and I were able to travel to Iowa for his funeral. Such an amazing man that we will miss dearly. He left behind his beautiful wife Maura, a 5 year old son and a 6 month old baby girl. It is heartbreaking.  We are so grateful for the memories that we have with Grant!

Friday, February 18, 2011

Andrew's Bean Dip

So, a few weeks ago I was at my sister's house, and her son Andrew was home eating lunch.  He had made this bean dip for his lunch that was so yummy! Once I tried it, I couldn't stop eating it.  He should have never let me have a bite!  So a few days later we were having having a friend over for dinner and having tacos.  So I made this for an appetizer with homemade tortilla chips.  Yum, Yum, Yummy!

Andrew's Bean Dip

1 can refried beans
1 cup of salsa (if you know my sister Laurie, her homemade salsa is the best for this)
1/2 cup shredded cheddar cheese (or however much you want to put in)

Mix salsa into the beans. Warm mixture up either in the microwave (stirring often) or in a saucepan on top of the stove.  When mixture is hot, stir in cheese and serve with tortilla chips.

Saturday, February 12, 2011

Homemade Tortilla Chips

Mmmmmmm. These are so good.  I have wanted to try making these for years, but just never did, until recently. I guess I just didn't realize how easy they are to make.  This is a new favorite thing at our house.  These chips are so yummy when they are fresh and hot, but they also keep really well in an air tight container for days (I don't actually know how many days, because they have always been gone after 2).

Tortilla Chips

Corn Tortillas
Oil
Salt (we like kosher salt best for these)


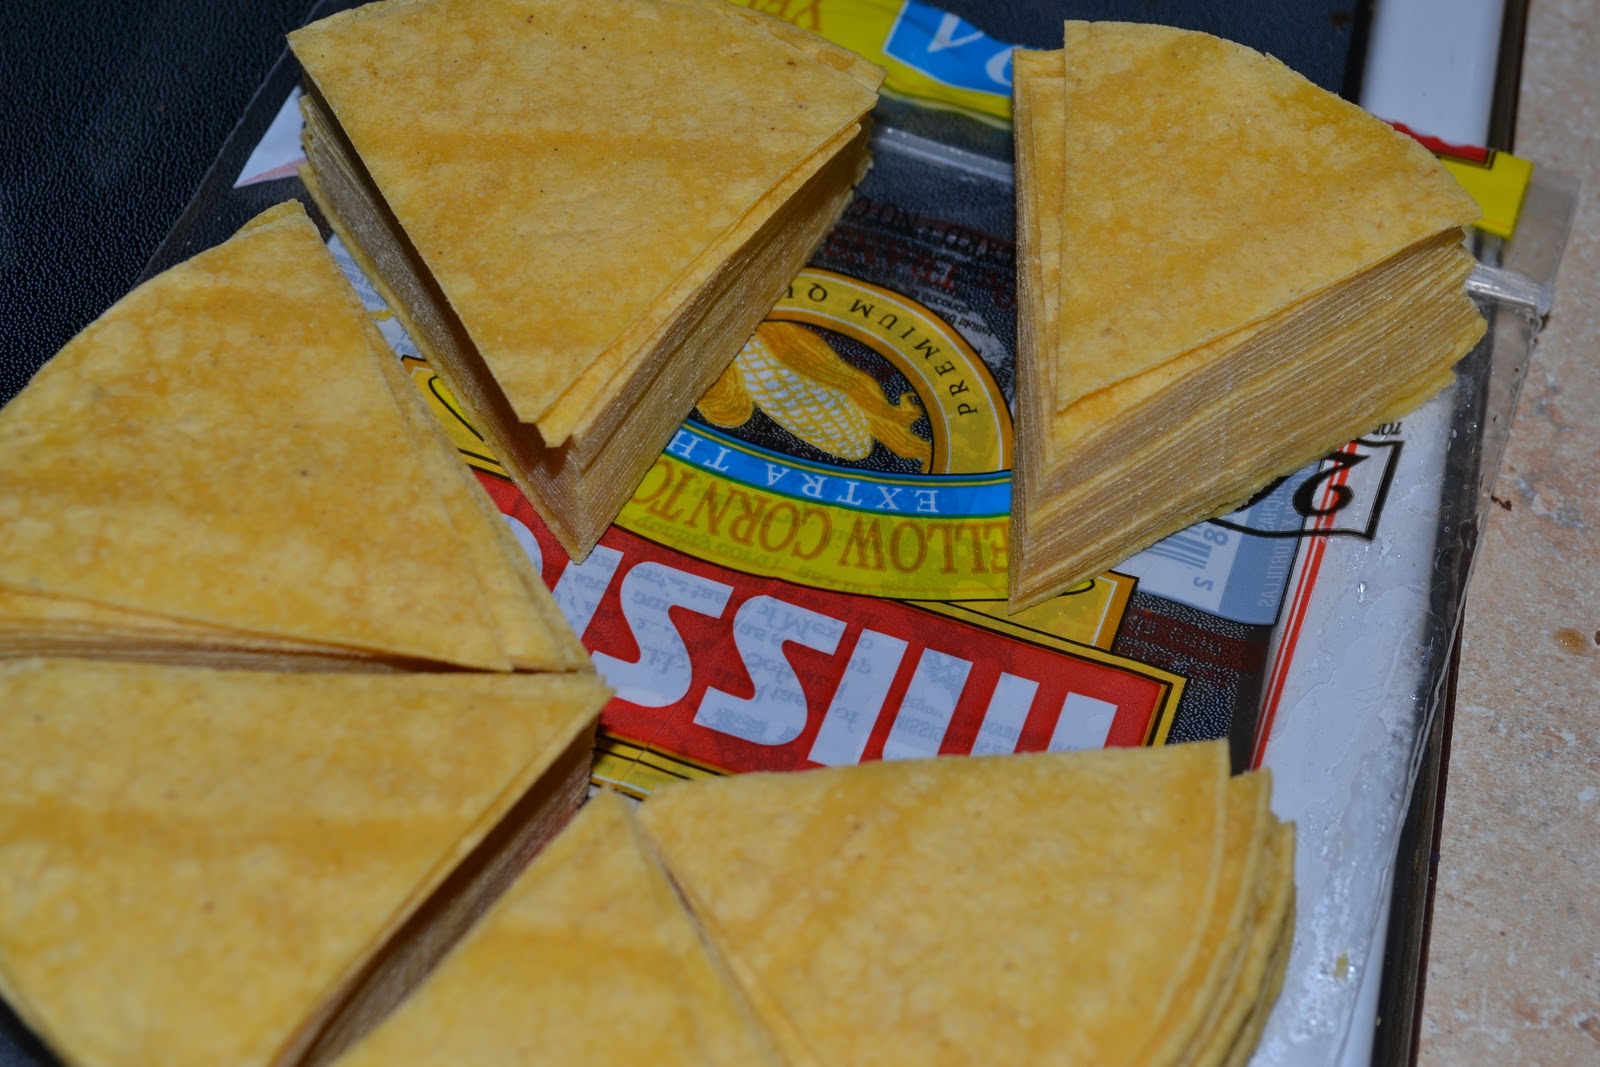
Cut tortillas into triangles

Cook in about 1 inch of hot oil (I don't know what temp... I start with my stove on Med/Hi, then after I have been cooking them for a little bit, I adjust the temp as needed, usually down to Med) turning once during cooking.


Cook until they start to turn a golden color. Remove from oil and place on paper towel to drain. The color will keep turning darker after you have removed them from the oil. Sprinkle salt on each batch as you take them out while they are still hot.

Tuesday, January 18, 2011

Pot Stickers

I learned how to make these from a friend in Iowa that is from the Philippines.  This is kind of a hard recipe to post, because I don't have a recipe, and every time I make them they are a little different.  I even taught a class a couple of months ago at my house on how to make these, and even then the ladies were saying "how much of that did you put in?" I tried really hard to measure things the last time I made them, so I hope this all makes sense.  I took a few extra pictures of the process...I hope that helps.

Pot Stickers

1 lb ground pork
1/2-3/4 package coleslaw mix (by the salad mixes in the produce section)
1 package won ton wrappers (in the produce section of all grocery stores)
Salt (about 1 tsp)
3-4 chopped green onions (or 1Tbsp dried minced onions)
2 garlic cloves, minced (add more or less according to taste)
1/8 tsp grated ginger (optional)

Mix ground pork with about half of the package of coleslaw mix, salt, onions, garlic and ginger. Place about a Tablespoon of the meat mixture on a won ton wrapper.


Put some water in a bowl and with either your finger or a pastry brush, wet all four sides of the wrapper.  Then fold 2 corners together, pressing them together.

 Then bring up the other 2 corners, sealing it all together.
Using a NONSTICK skillet, place a little bit of oil in the pan, (I used about 2 Tbsp for my large 15 inch skillet) then place the pot stickers in the pan.
Saute over med/med-hi heat until the bottoms are a golden brown.
This is the tricky part.  At this point you need to add some water to the pan, but it is hard to tell you how much, because a lot depends on the size of pan you are using.  You need enough that it will last for the whole steaming process, but not too much.  I used about 1/2 cup in my 15 inch skillet.  As soon as you pour the water in, cover immediately.  Steam with cover on for 5-7 minutes, until pork is completely cooked through.
Remove cover and serve.

A few more bits of info:
*If you run out of water during the steaming process before they are done, add a little more and continue to steam
* You can add any other ingredients or seasoning that you want. You can also try using different ground meats, like chicken. (I have only used pork, but I bet others would work fine)
* We like to dip these in soy sauce that has a little bit of red wine vinegar drizzled into it
*You can freeze these.  After you have them assembled, freeze them in a single layer, after they are frozen, you can put them in a ziplock.  Then take them out and cook them from the frozen state, don't thaw first.  You will just need to increase your cooking time, and probably use more water.
* To make egg rolls instead of pot stickers, buy the egg roll wrappers (or you can make mini egg rolls with these wrappers).  Add the whole package of coleslaw mix instead of just half.  You can also add things like rice noodles, and bean sprouts.  Wrap them up egg roll style, starting with a corner, then tucking in the side corners (kinda like rolling up a burrito). Fry them in about 1/2 inch of oil, turning over once.
*These are fun to make for a group when you have everyone help you assemble them.
*Let me know if you have questions!

Sunday, January 2, 2011

Ranch Cheese Ball

I was always unwilling to even try a cheese ball. They just never looked appetizing to me with all the nuts and other stuff on them.  But then, when I was first married, my sister Laurie made this one for a family get-together and insisted I try it.  It was so yummy.  There was nothing funky on it or even in it!  It is super easy to make too.  I always keep extra cream cheese around during the holidays so I can throw this together when I need a last minute snack or appetizer.

Ranch Cheese Ball

2 8oz bricks of cream cheese, softened
1 packet of Ranch Dressing Mix
about 2 cups shredded cheddar cheese, divided

Mix cream cheese, ranch mix and 1 cup of cheese. I usually do it in my stand mixer, but you can use a hand mixer, or even do it by hand, just make sure the cream cheese is really soft.  Pour the rest of the cheddar cheese onto a plate.  Form cream cheese mixture into a ball with your hands, then roll it in the cheese, making sure the whole ball is covered.  Refrigerate until ready to serve. Serve with crackers.

Sunday, December 26, 2010

Bacon Wrapped Water Chestnuts

When I was in college, I had these at a party and loved them, but even though I thought of them a few times over the years, I never made the effort to find a recipe and make them. Then I had them again about a year ago when a friend made them and remembered how amazing they were. A few weeks ago, we threw a little party for my mother-in-law to celebrate her being alive, one year after her heart attack.  I wanted to do a bunch of appetizers for the party, and thought about these little guys, so I googled them, trying to find a good recipe.  I found this super easy, yummy one on the Taste of Home website.

Bacon Wrapped Water Chestnuts

1 lb bacon (regular sliced, not thick sliced)
2 cans whole water chestnuts
1 cup brown sugar
3/4 cup ketchup
3/4 cup mayo

Cut bacon slices in half, then wrap each half around a water chestnut and secure it with a toothpick.  Place in a 9x13 pan and bake at 400 degrees for 35-40 minutes, until bacon is crisp.  Remove from oven and place the chestnuts in a different 9x13 pan (the recipe says to drain the fat from the first pan and leave them in it, but I think it is a lot easier to just put them in a different pan). Mix the brown sugar, ketchup and mayo.  Pour mixture over the chestnuts and place back in oven for 5-10 minutes, until sauce is really bubbly.  Remove from oven and serve.

Tuesday, November 23, 2010

Cranberry Chutney


I got this recipe a few years ago at a church "Thanksgiving Recipe Exchange" from my friend Leigh Okleberry.  My husband and my dad absolutely love this stuff.  You can serve it with your turkey instead of that canned cranberry sauce, or you can serve it over a brick of cream cheese along with crackers for an appetizer.

Cranberry Chutney


12 oz. fresh cranberries
1 cup sugar
1/2 cup brown sugar
1/2 cup golden raisins
1 tsp. ground ginger
1/2 tsp. ground cloves
1/4 cup cider vinegar
3/4 cup water
1 cup chopped onion
1 cup chopped celery
1 cup chopped apple


Combine cranberries, sugars, raisins, spices, vinegar and water in a large pot (actual recipe says "3 quart saucepan").  Cook over medium heat stirring frequently until the cranberries pop.  Reduce heat. Stir in the onion, celery, and apples.  Simmer the chutney uncovered for 30 minutes, until it is thick.  Will keep in refrigerator for 3 weeks.

Wednesday, October 13, 2010

Jalapeno Cheese Spread

Every fall we make a trip to Logan. We started it when we were first married, and have gone every year, except of course when we lived in Iowa.  It has been fun since moving back to have our kids get excited about going.  We do the same things each year.  We go see Steve's great grandparent's home in Hyrum, and Steve tells the kids stories of playing there as a child and shares memories of his Great Grandma (she lived to be 102, and Steve was 14 when she died).  We also go see some buffalo that are just a couple blocks away from that house. We usually either drive up Black Smith Fork Canyon or up Logan Canyon, then we always eat at Papa Kelsey's Pizza.  YUM.  But the main reason we go each year is to get some Gossner's cheese.  We love their squeeky cheese and these yummy cheese spreads that they make.  So this year we went up, and did all of the usuals.  When we got home though, one of the sacks got accidently left in the back of the van.  I won't name any names.... okay, it was Steve's fault.  The sack that got left behind had the cheese spreads in it.  Steve was so bummed.  He was totally looking forward to eating some of his jalapeno spread during our Church's semi-annual General Conference.  So I decided to come up with my own version of it.  He loved it.  Success!  So here is the recipe in case anyone else wants to try it.
P.S. The other spread we always get for me (I am not a jalapeno fan) is a garlic one.  I am planning on trying to come up with my own version of that one too.  When I do, I will be sure to share the recipe.
P.P.S.  I have no idea if I am spelling Jalapeno right!

Jalapeno Cheese Spread

1 8oz brick of cream cheese (at room temp)
2 cups shredded cheddar cheese
1/3 cup milk
2 Tbsp lemon juice
1 can diced jalapenos

Mix all ingredients in mixer. I mixed it for about 2 or 3 minutes, to try and get it kinda light and fluffy.  Serve with crackers.

Thursday, July 8, 2010

Spinach Artichoke Dip


This is one of my favorite appetizers to make! My friend Jennifer Anderson brought this recipe to a recipe exchange...before we were really friends. We became good friends shortly after, and I adore her. We were sad when their cute little family moved to Provo a few weeks ago... but we still look forward to getting together with them.
You can serve this dip with Pita, corn chips, veggies, or bread. I always serve it with a yummy, crusty, french baguette.

Spinach Artichoke Dip

1 brick cream cheese
1 1/2 cups parmesan cheese
1 cup light mayo (I have used regular and light... both work)
1 can quartered artichoke hearts (15oz can) drained
1 can green chilies (4oz can) chopped and drained (I leave the chilies out)
1 to 2 cups fresh spinach, chopped (I put in a lot more...like 4 or 5 cups)

Blend cheeses and mayo well, then add artichokes and spinach. Spread in baking dish and bake a 350 degrees for 20-30 min, or until sides and top are just barely brown.
Related Posts Plugin for WordPress, Blogger...